WH-1000XM5 Hinge Replacement/Repair Guide
Table of Contents
#
Introduction
There are a lot of posts about the WH-1000XM5 hinge breaking on Reddit, and some reviews being left on online retailers such as Amazon. I have a bit of experience replacing the hinges and have written this guide to help people who want to D.I.Y. the repair. This post will contain a lot of information and several solutions to fix your headphone’s snapped hinge.
I’ve read through countless posts on Reddit, and have contributed my own opinions and recommendation on this issue before creating this post. Sony does not offer in-warranty repairs in North America for physical damage on the XM5’s. Some countries and regions with better consumer protection such as Europe, Australia, and UK may get better support from Sony, or the retailer you’ve purchased your headphones from. I would suggest you exhaust all proper channels of support before attempting to repair these yourself because any damage done through the process will likely void any warranties.
If you don’t want to read my thoughts on the situation, you can skip to the bottom where I have written an extensive guide on how you can repair your broken hinge.
I don’t have expertise in mechanical, or material science, so I can only make speculations on why the hinge breaks. Anything written beyond this paragraph is my own opinion, and I’ve tried to back it up with photos and statements from Sony.
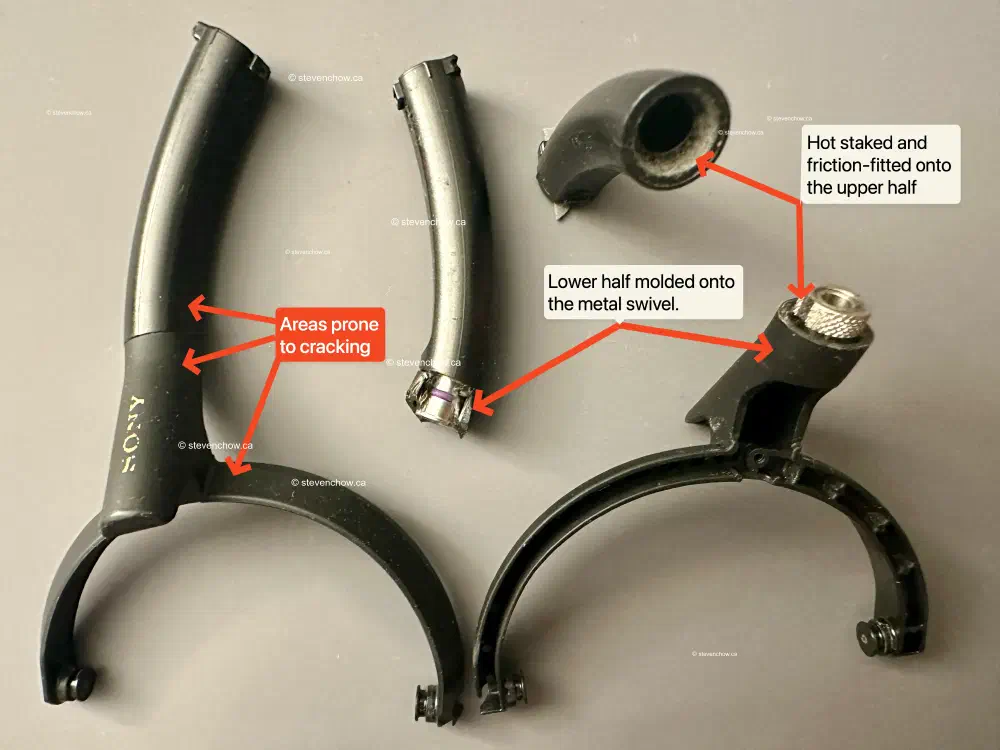
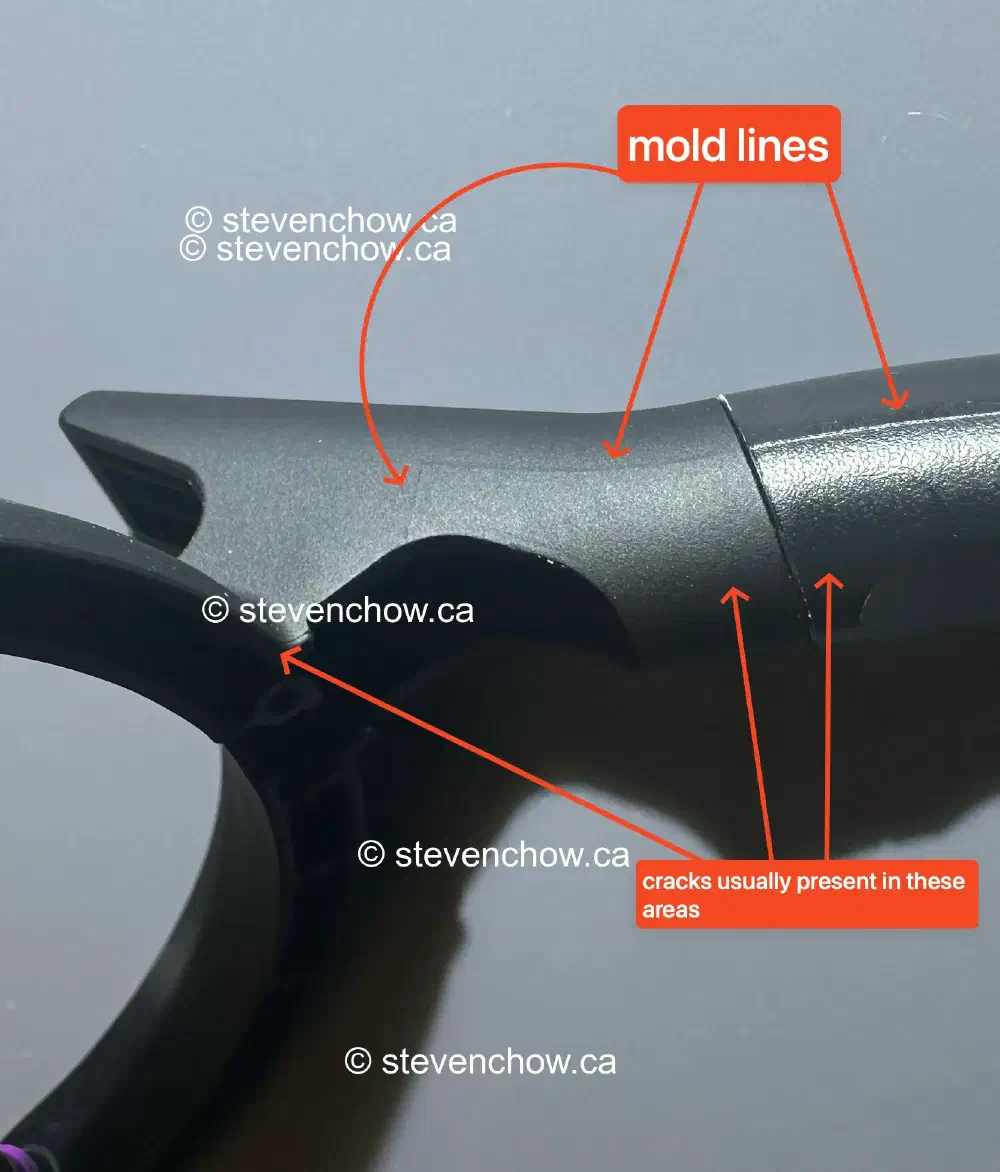
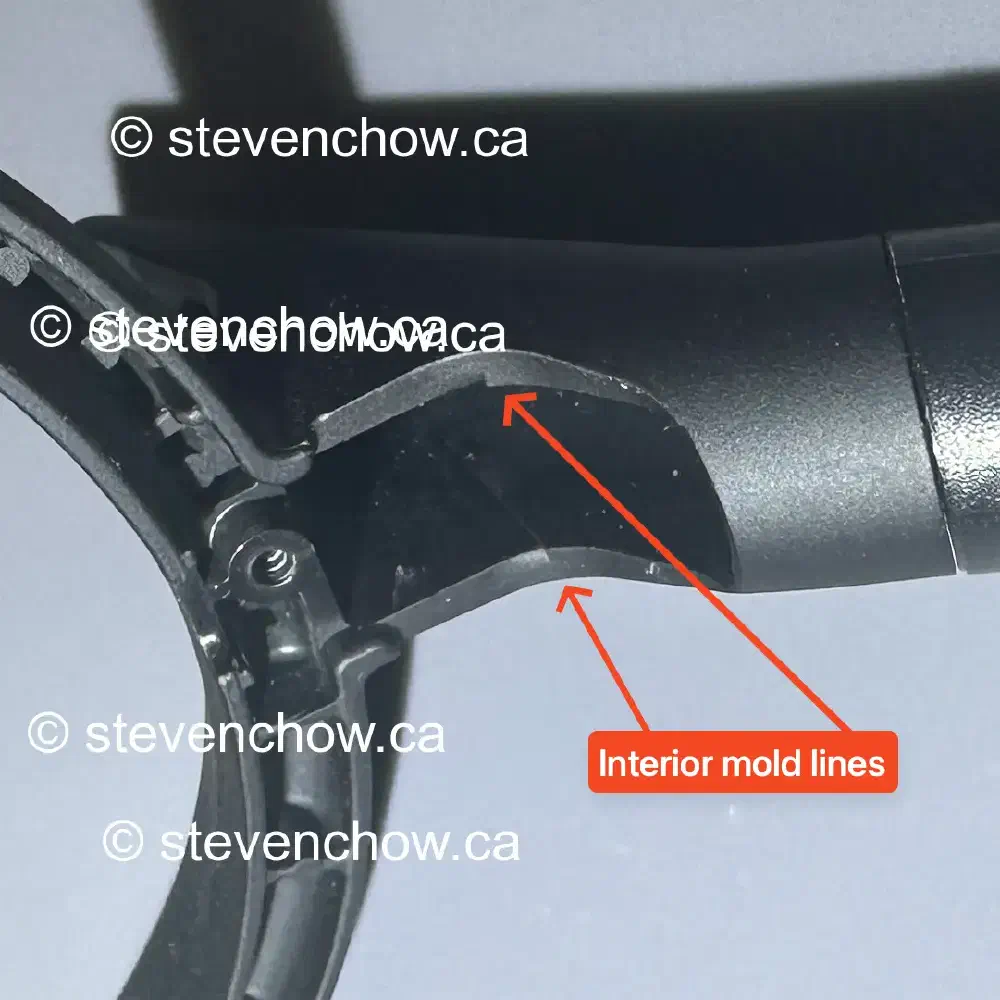
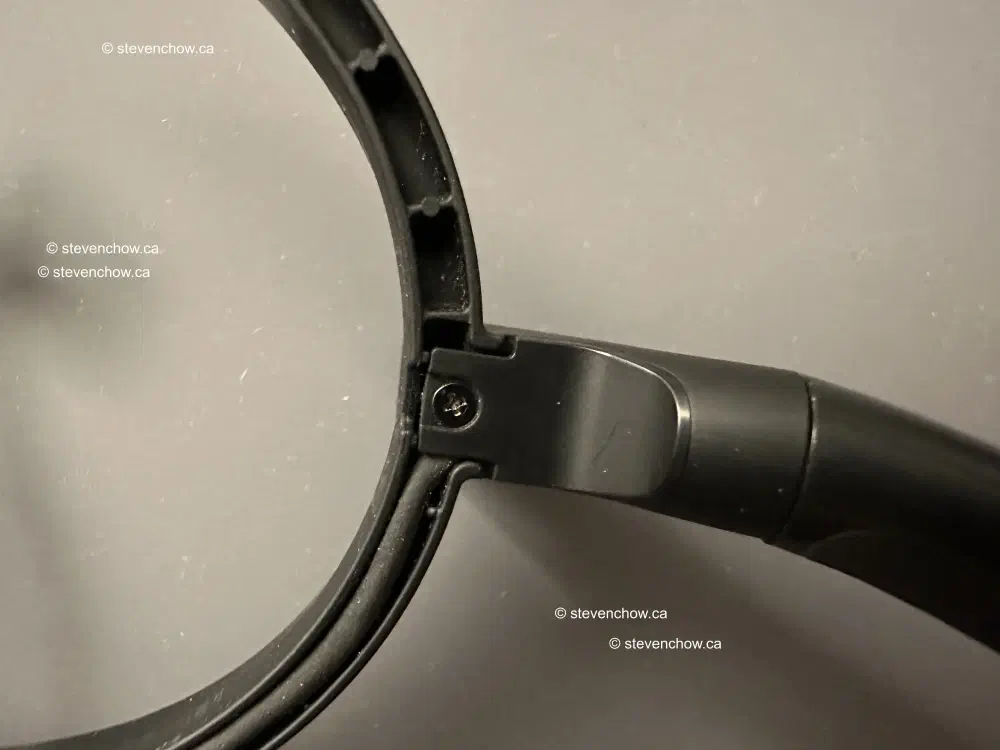
The biggest reason is probably due to the use of thin ABS plastic in a stress prone area. The swivel mechanism is metal which is heat staked and friction-fitted into a plastic tube upper half. There are cases where this has come loose from cracks on the upper tube and people have troubles pushing it back in. The u-curved lower half looks to be molded onto the metal. When the lower half cracks, continual stress from wearing the headphones will eventually lead to failure. It’s hard to notice cracks and that’s why it may seem that the hinge spontaneously breaks.
These are expensive headphones, and I’m surprised Sony is still using mostly plastic in their design while competitors like BOSE QuietComfort Ultra and Apple AirPods Max have metal hinges- granted, they are a bit more expensive. The thickness of the plastic also doesn’t provide enough reinforcement for the continual stress during the lifetime of the product.
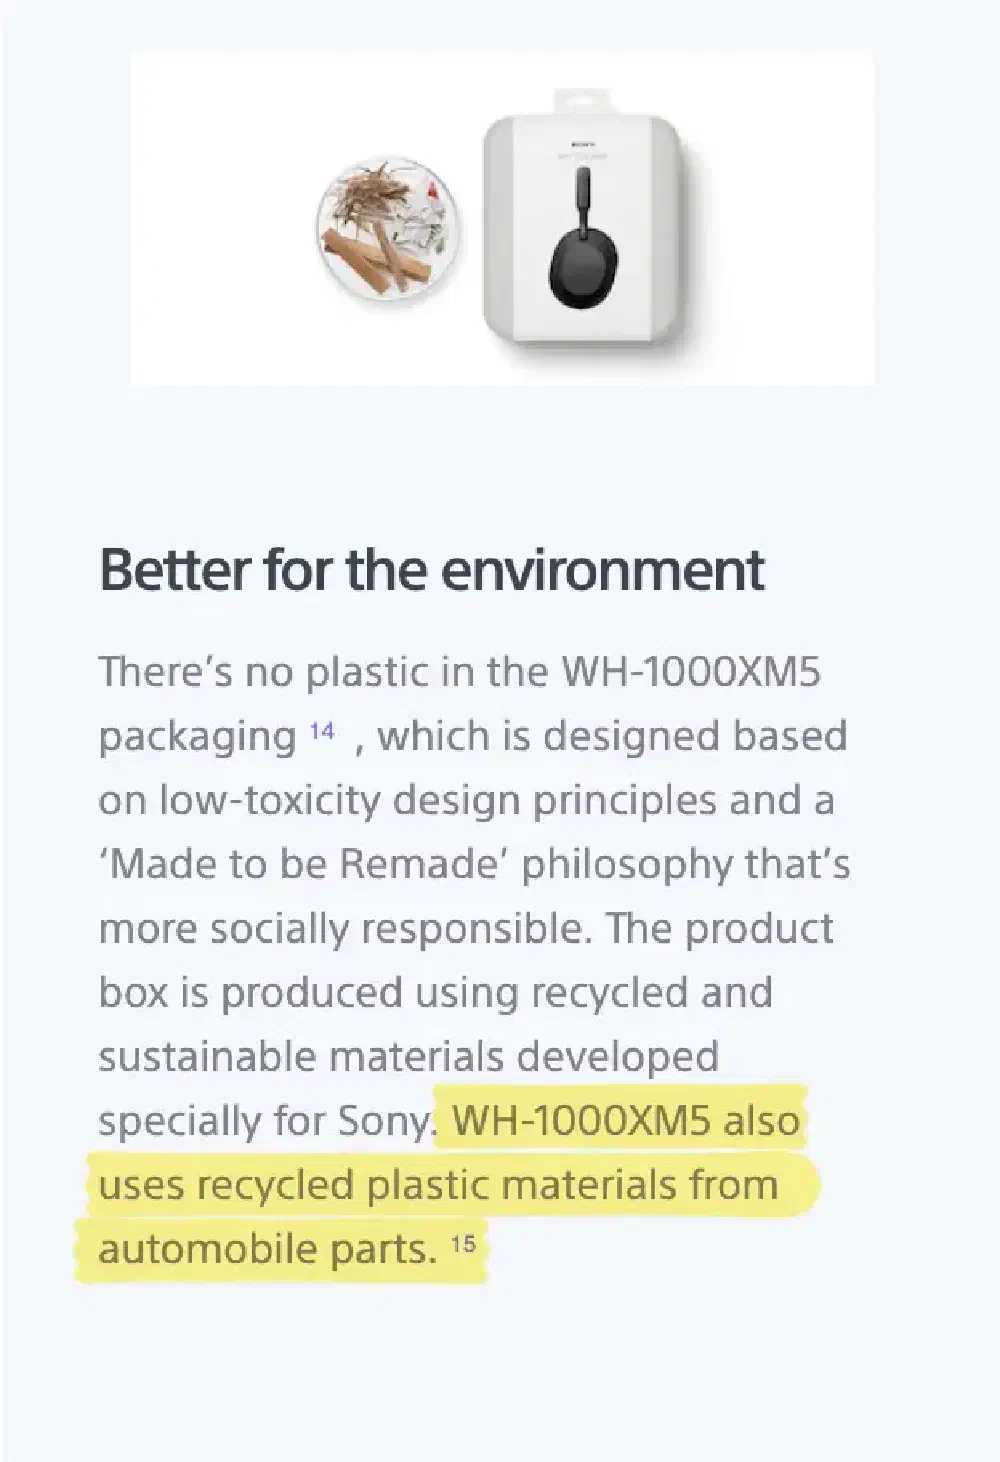
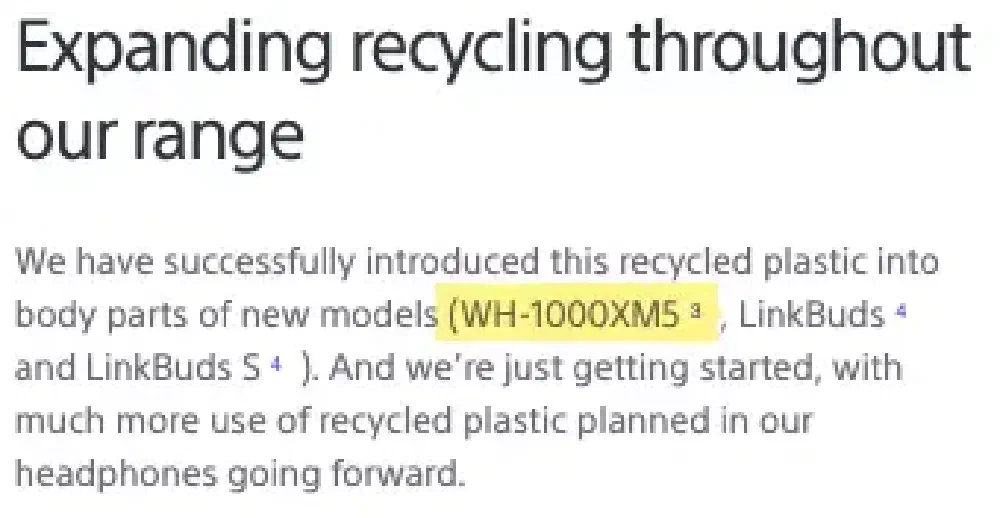
This is mostly anecdotal, but a lot of posts of broken hinges on Reddit are from people who have recently purchased WH-1000XM5s. Those with headphones from the initial release seem to be fine. This lead me to find some posts from Sony stating the use of recycled plastic from automotive parts in their headphones and earbud manufacturing.
source: https://www.sony.ca/en/electronics/headband-headphones/wh-1000xm5/specifications
Sony states a use of 85% of recycled material in plastic and a 98% of recycled material for Black materials. A majority of broken hinges posted on forums seems to be Black. This could be because Black is likely the most popular colour, so the sample size for Silver, Midnight Blue and Smoky Pink are small. There are few Grey, fewer Midnight Blue and zero Smoky Pink broken hinge posts. The amount of recycled plastic in the material of the hinges could play a part, so I would recommend those who are still interested in purchasing the WH-1000XM5’s to pick anything but Black. This may or may not be a factor, but I think it is probable.
The use of recycled plastic may not be a problem for earbuds, but headphone hinges are constantly stressed by being worn and taken off.

source: https://www.sony.ca/en/electronics/eco/headphones#Interview
Many users unknowingly abuse their Sony WH-1000XM5 headphones through rough or improper handling (dropping, gym, running, sleeping in them), which can lead to broken or weakened hinges over time. A common issue arises when people repeatedly twist the ear cups beyond their designed range of motion, apply excessive force when removing, or toss them into bags without proper protection. This kind of stress, especially when done frequently, can weaken the internal hinge mechanism or cause small cracks in the plastic near the joint, eventually leading to complete hinge failure. Additionally, failure to use the carrying case or leaving the headphones exposed to high heat or pressure (like sitting on them or stuffing them in tight spaces) further accelerates wear and damage.
Summary:
- Thin plastic used in a high stress point area
- Small cracks occur (unnoticed) and will eventually lead to (spontaneous) breaks
- Recycled plastic being used in newer produced XM5’s
- 98% of recycled material is used in Black, so buy other colourways
- 85% recycled material in (Silver, Midnight Blue, Smoky Pink)
- Headphone abuse
#
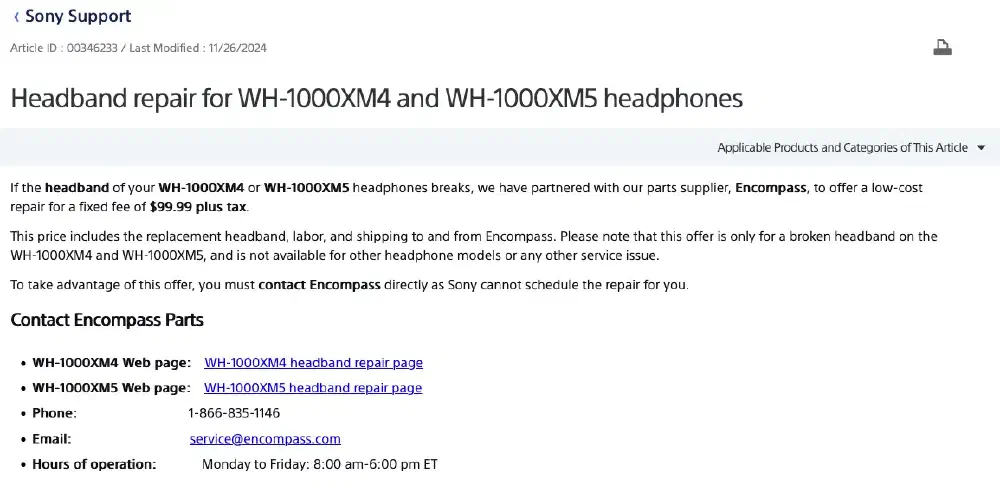
Official SONY repair offerings
As of 2024/11/26, Sony North America is offering repair services with their partnered repair parts/service providers.
##
For USA
https://www.sony.com/electronics/support/articles/00346233
##
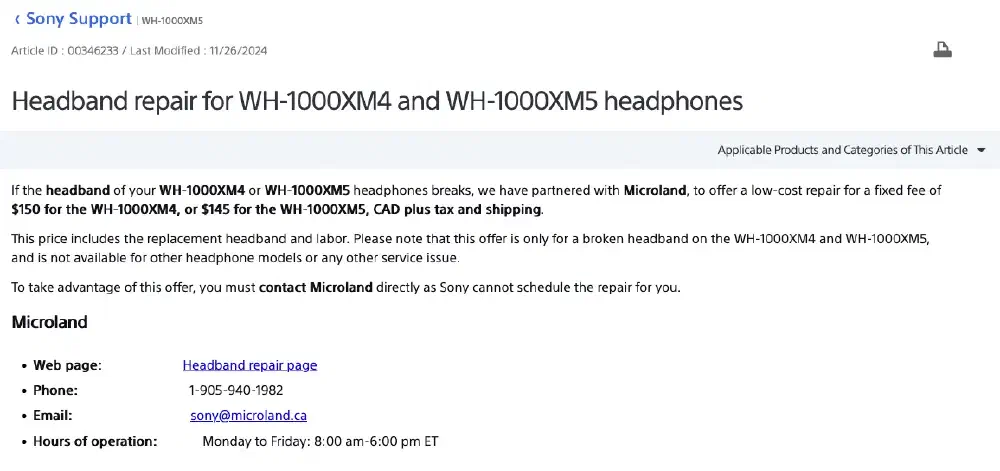
For Canada
##
Sony repair services in other regions
I have not done any inquiries for repairs offered in places outside of USA and Canada. I would highly suggest you contact Sony and your retailer for help with replacements before attempting anything in this post. Also try to search up any type of consumer protection laws your country has and bring them up to Sony in the request email/other forms of contact.
Contact Sony of your region or the retailer you purchased your headphones from.
#
D.I.Y. Approaches
##
1. Epoxy or Super Glue
There are a lot of good videos on youtube showing how this can be done. I have not personally tried this method because the swivel mechanism will be glued in place.
Techscrew DIY from YouTube has a good video on this process.
I would recommend the use of epoxy designed for ABS plastic instead of super glue since the later is more brittle. In the video, they added baking soda as a gap filler and a type of reinforcement.
Recommended Epoxy:
- J-B Weld 50132 PlasticWeld Quick-Setting Epoxy Syringe
##
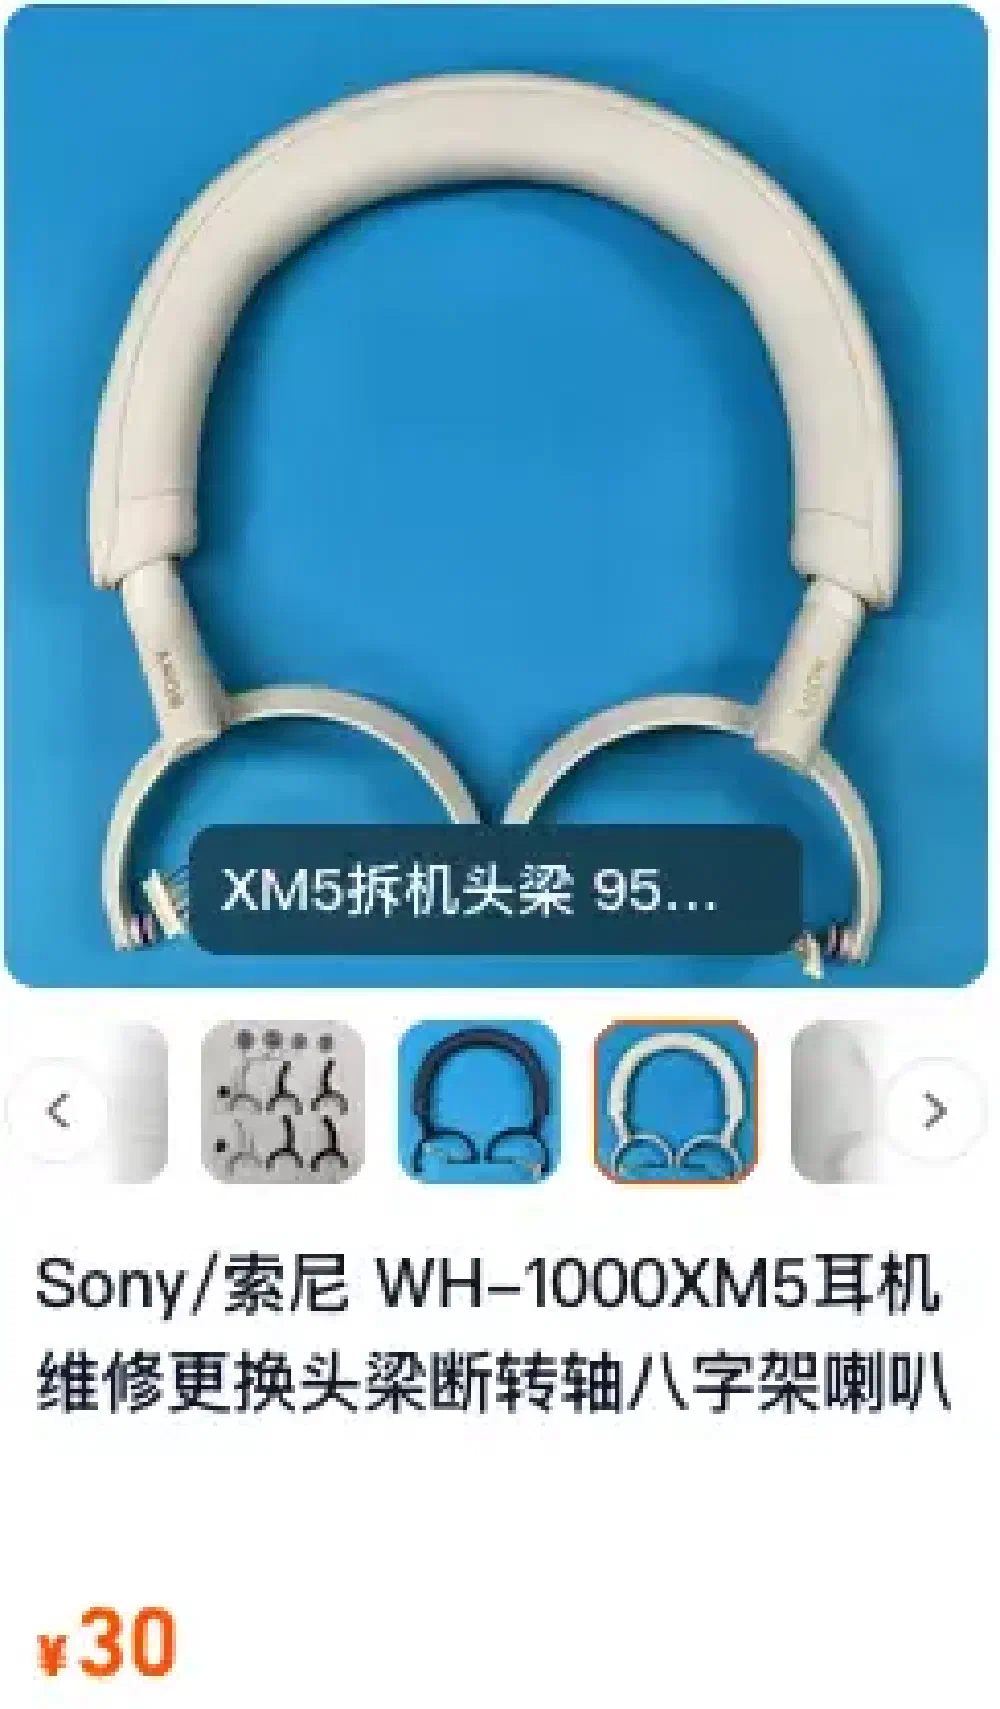
2. Headband Assembly Replacement

###
Tools and parts required
Estimated Time: 30-40 minutes Cost: $80 CAD based on prices at time of writing
Note: Headband assemblies ordered from Aliexpress tend to not have SONY logos. I’ve come across a store from Taobao that do have logos.
###
Video Guide: WH-1000XM5 Headband Assembly Replacement
work-in-process
###
Remove foam ear pads and foam insert
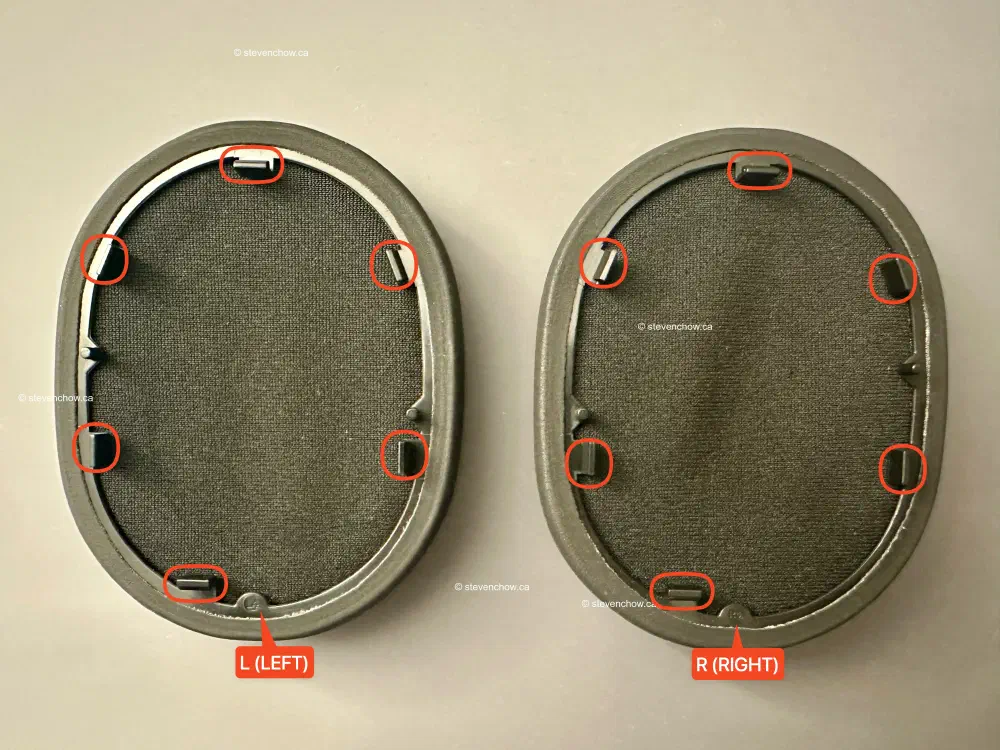
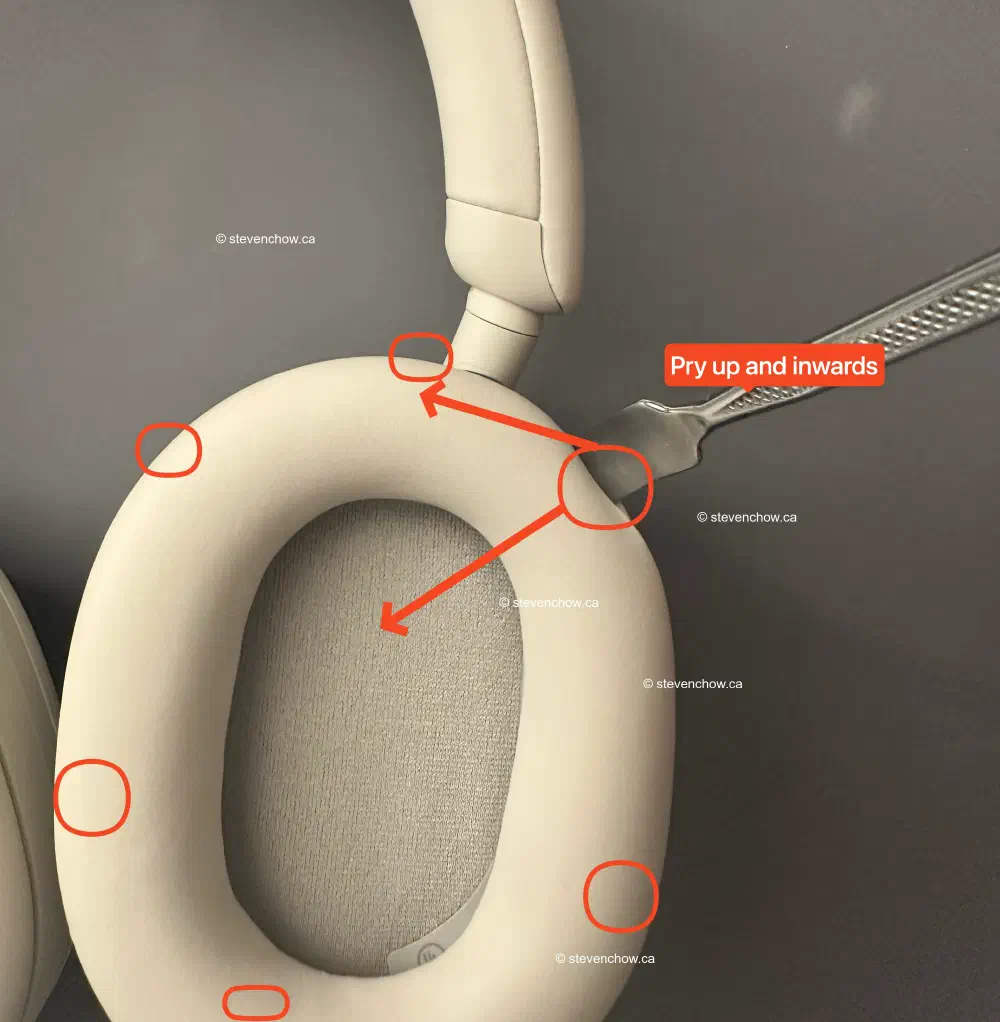
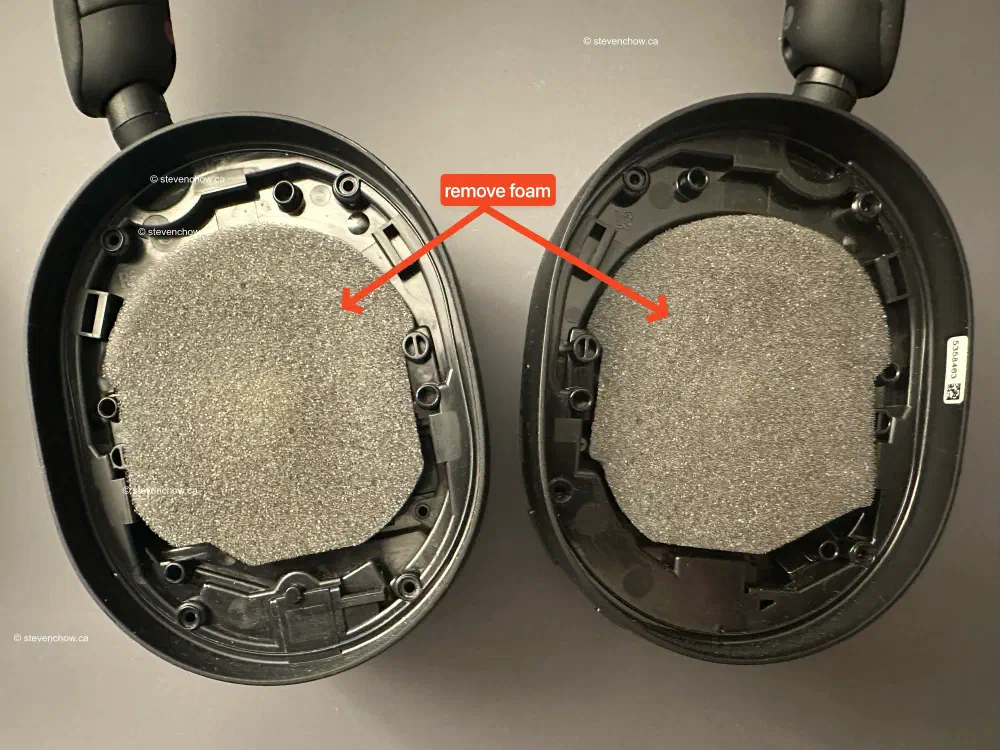
Once you have removed the ear pads, you can remove the inner foam inserts.
###
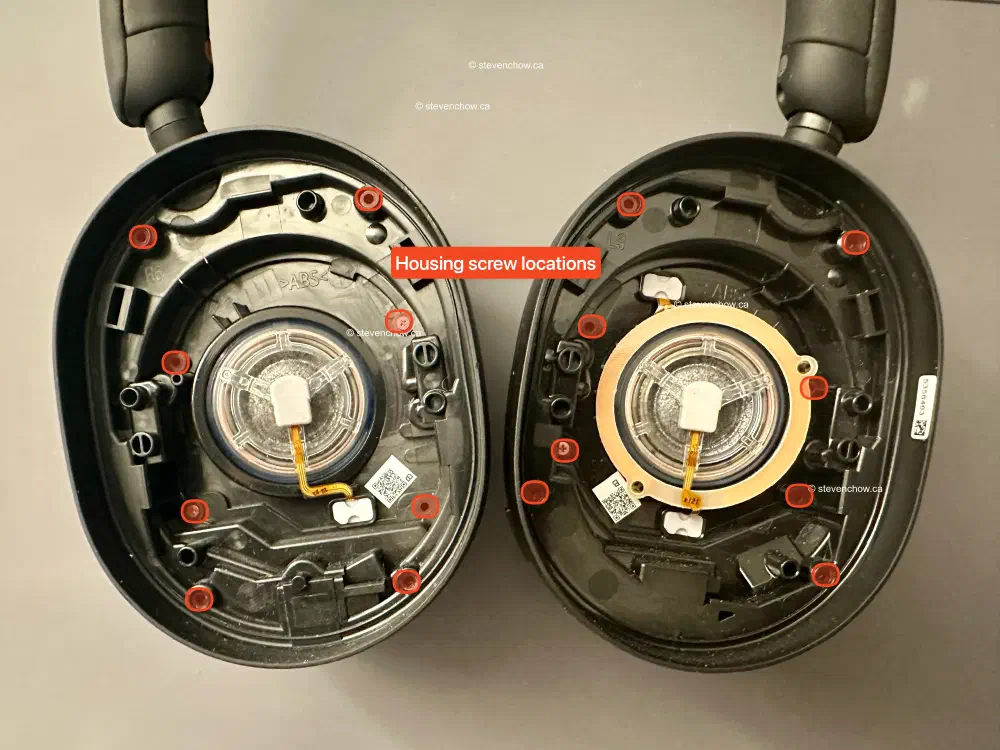
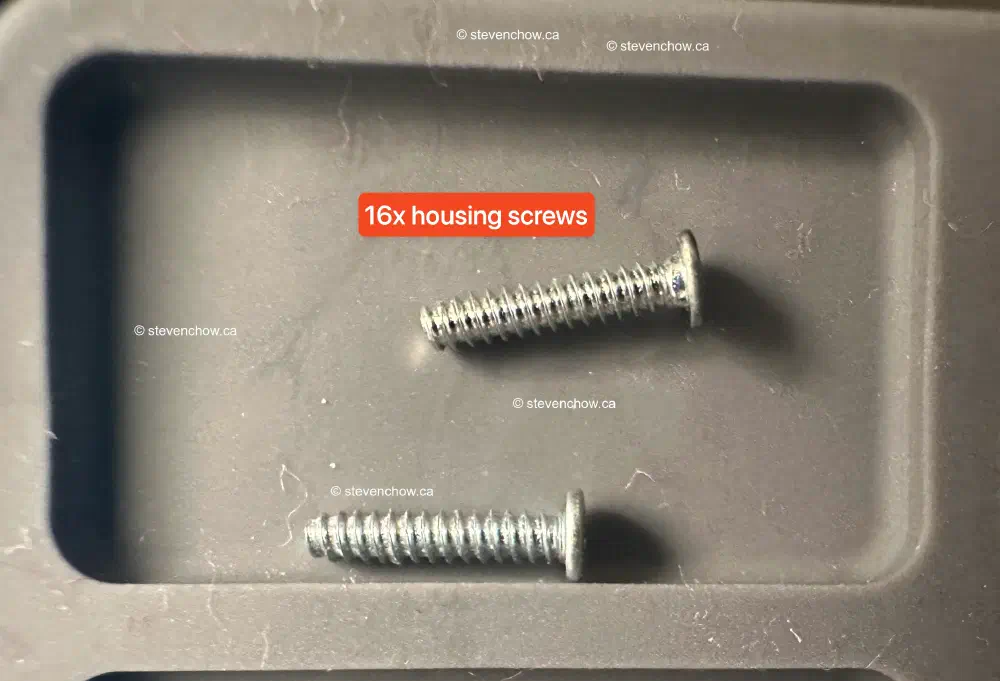
Remove the 16 screws holding the outer housing
###
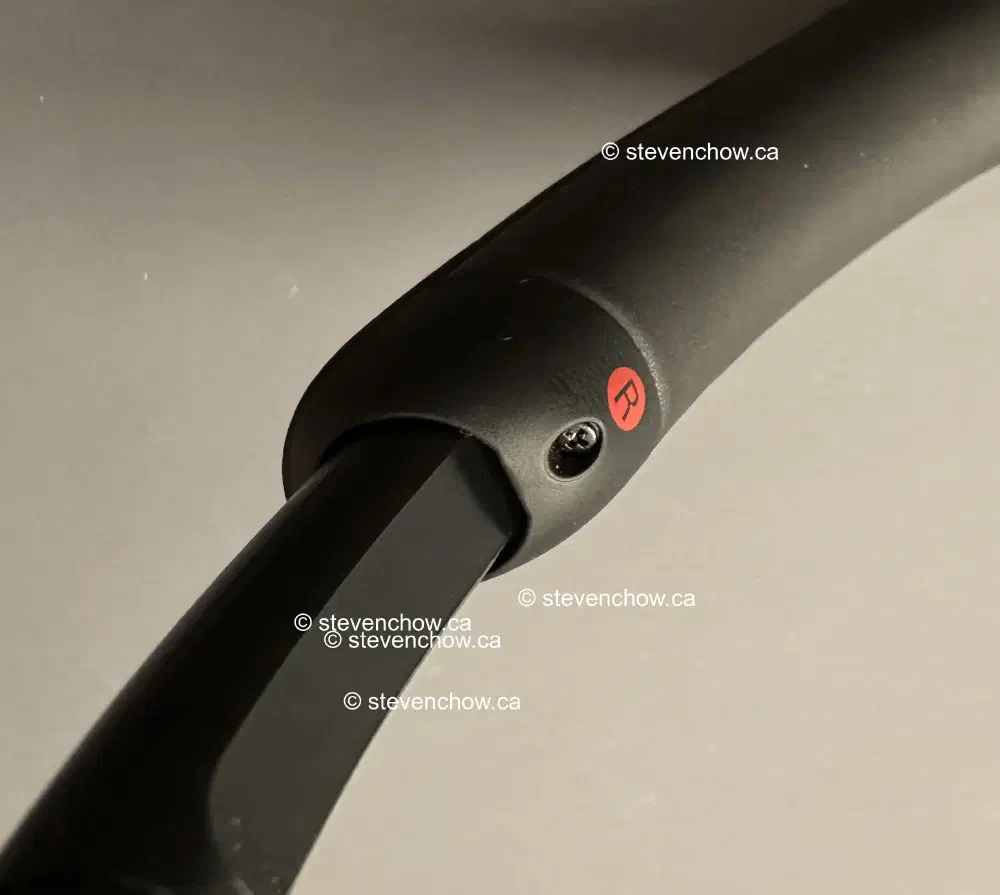
Remove the RIGHT outer ear cup
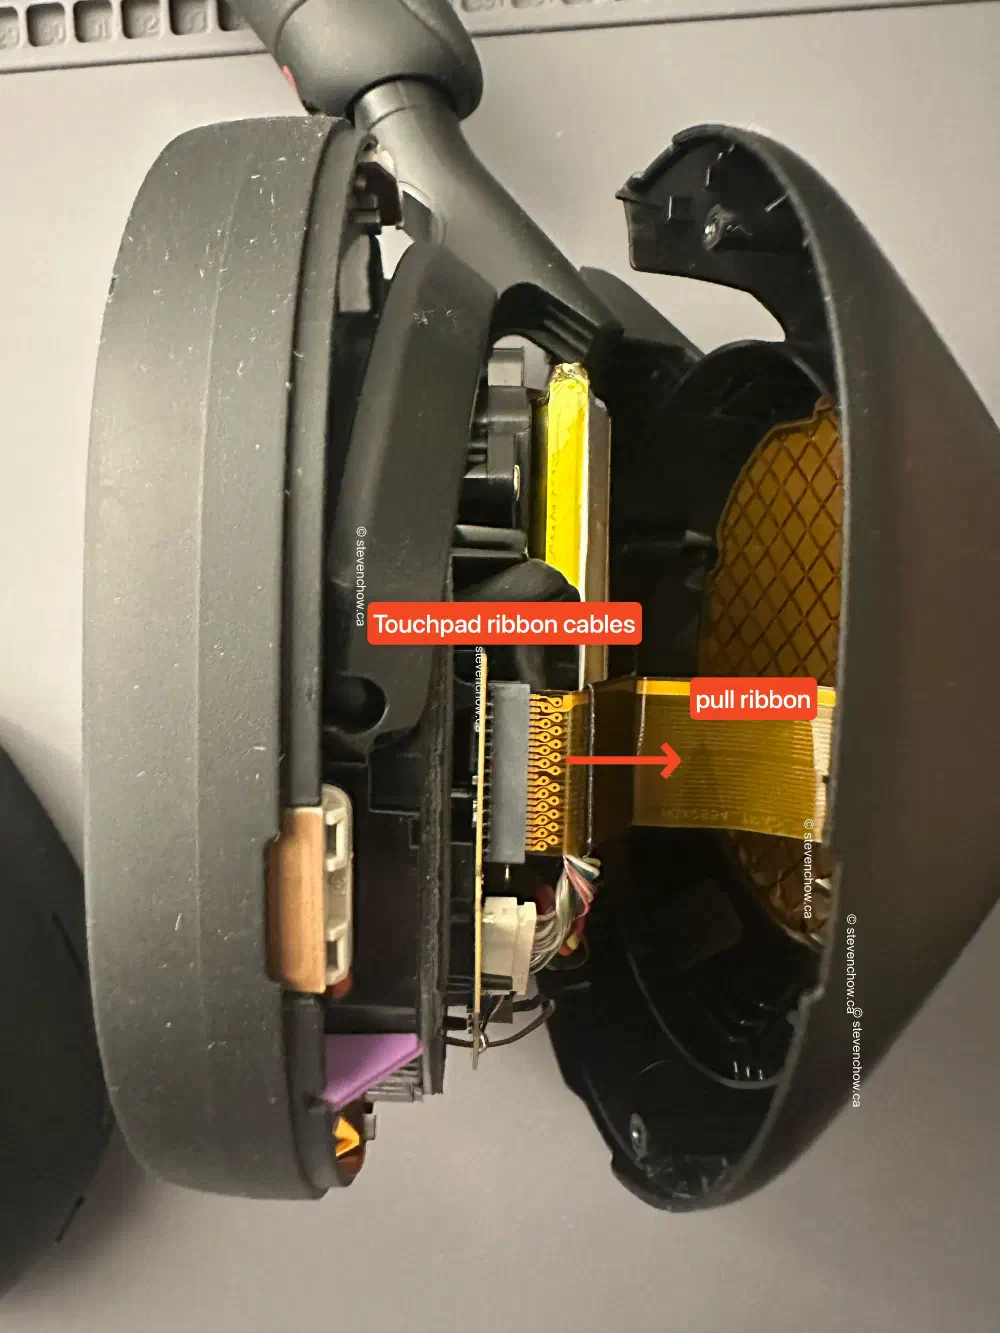
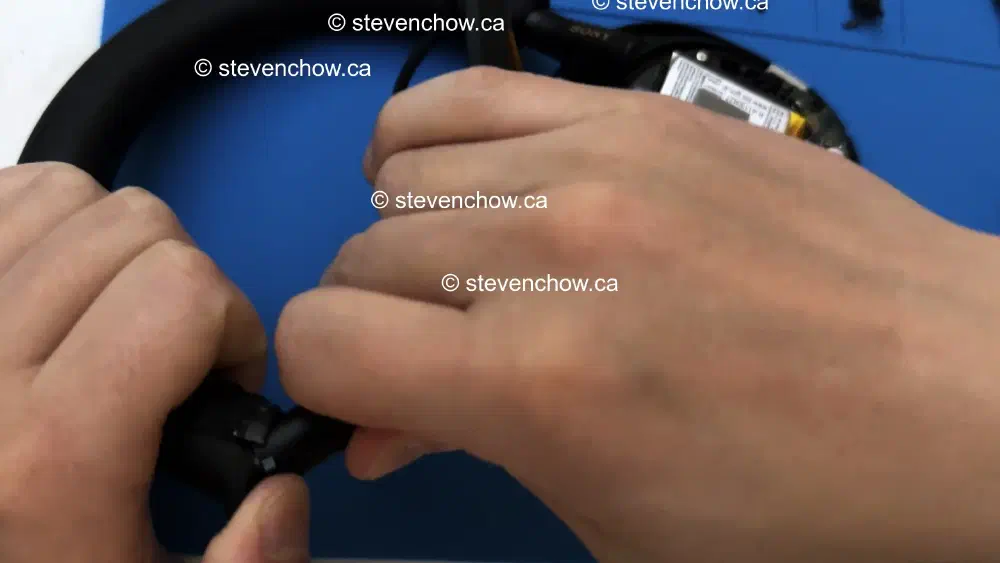
You will want to remove this side first because the touchpad ribbon is connected to the right side’s main board. Tilt the ear cup to one side and create a gap for you to reach in and loosen the ribbon.
###
Remove RIGHT side ear cup assembly
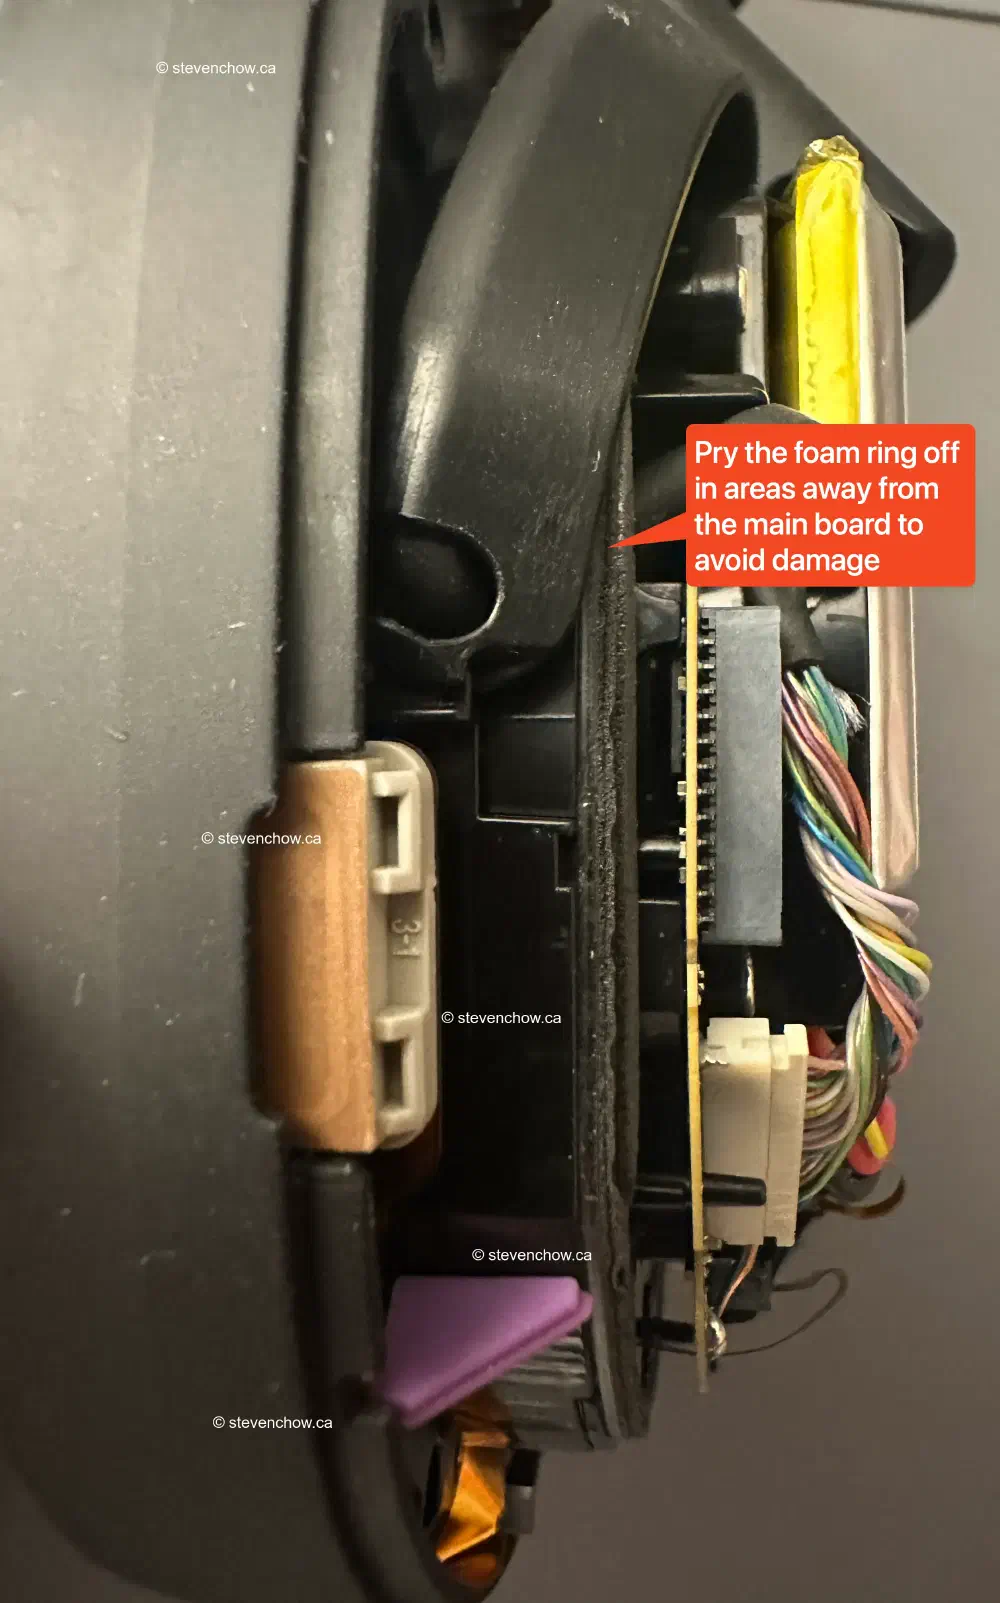
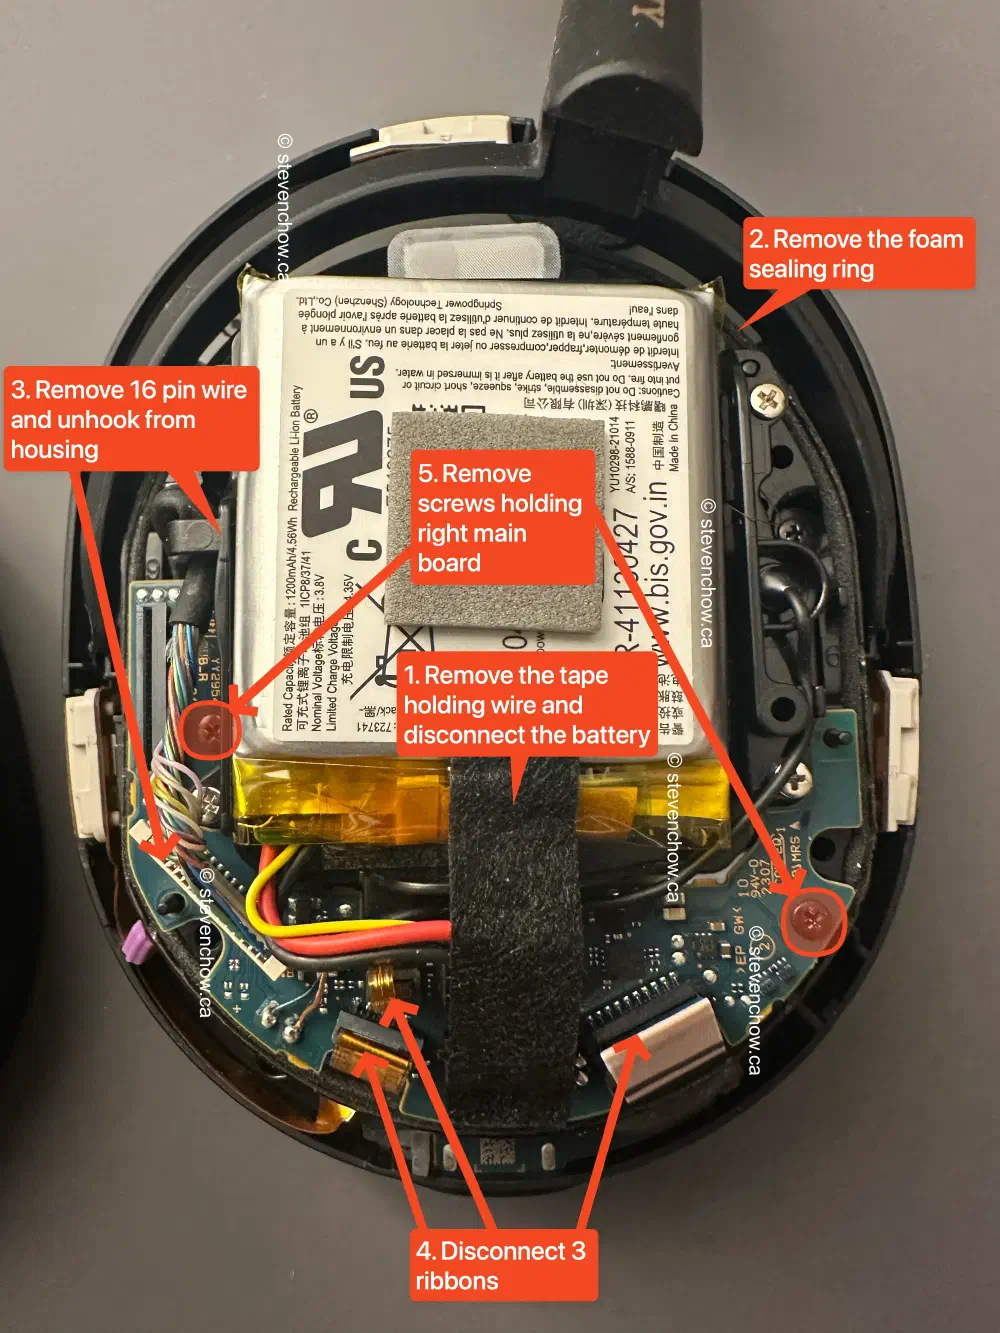
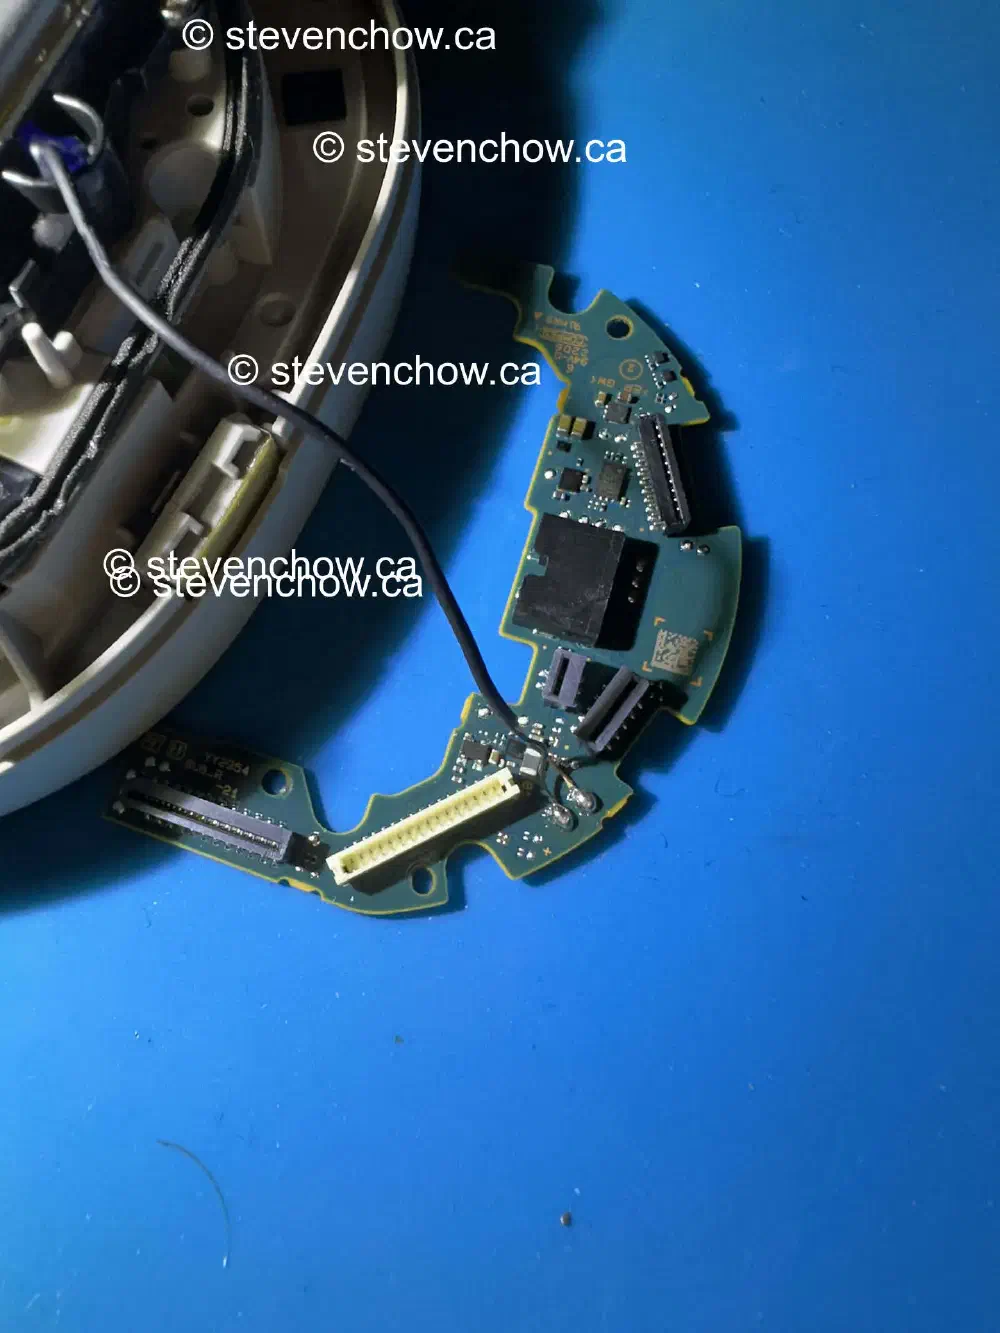
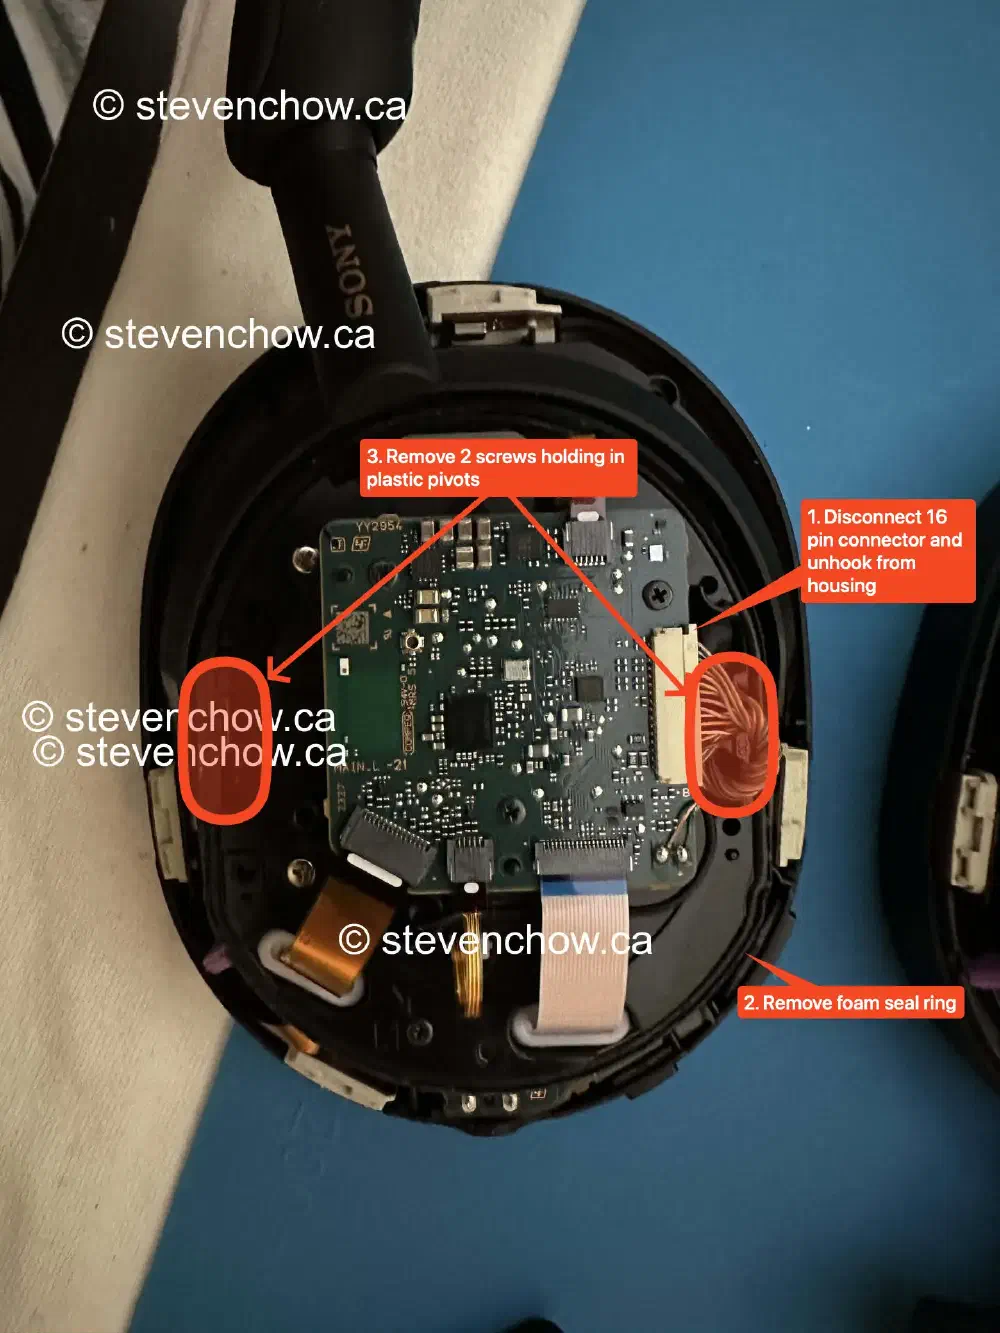
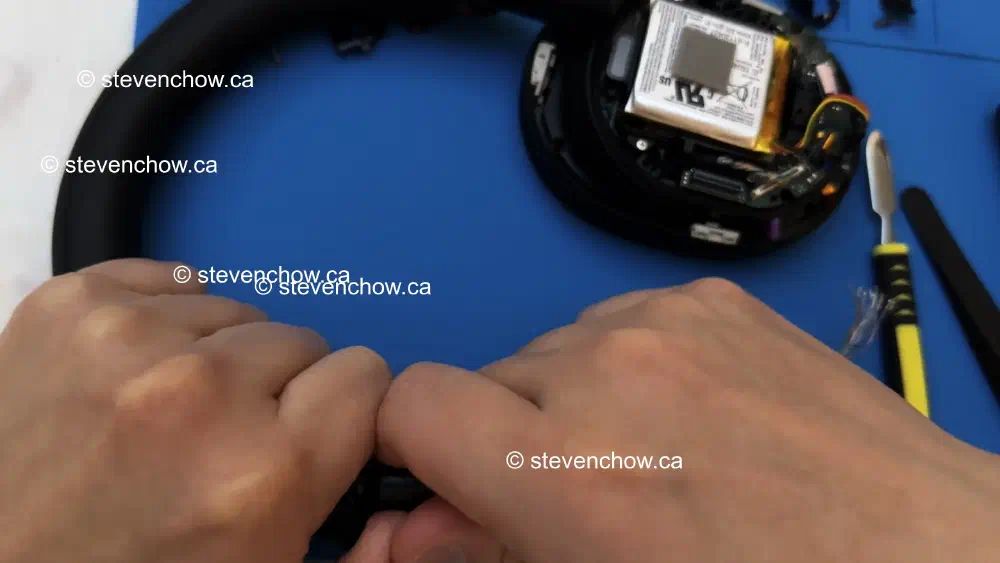
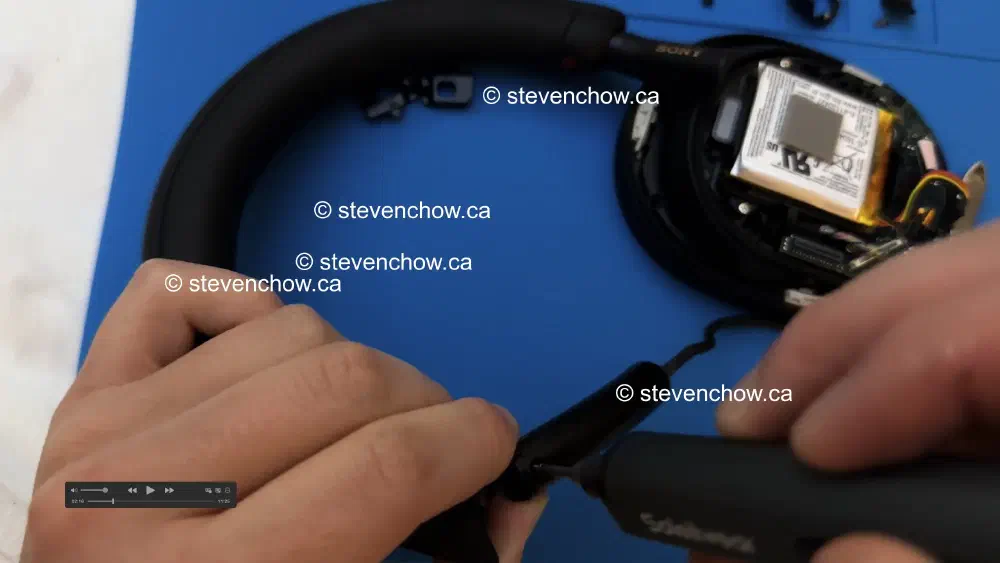
This side is a bit tricky to remove because one side of the hinge is held in below the main board. You will first need to remove the adhesive tape holding the battery cable in place. Then disconnect the battery (IMPORTANT). The next step will be to remove the foam seal. You will want to do this as the second step because once the mainboard is loose, you will have a hard time trying to pry it up with the board dangling.
To access one side of the hinge, you will need to disconnect the 16 pin cable and move it to the side, 2x feedback mic ribbons, charger board ribbon, and remove 2 screws holding the board in place.

###
Remove LEFT side ear cup assembly
###
Installing new assembly
Transfer to new assembly and repeat the steps prior in reverse. Make sure each step is reversed.
##
3. Single Hinge Replacement
The RIGHT and LEFT ear cup will be very similar. The only difference will be the steps taken to remove the ear cup from the assembly. You can check out the whole headband assembly replacement for the steps to remove the headband from the ear cup. I will be skipping the steps to remove the ear cup from the assembly.
NOTE: when replacing only the LEFT side, you will still need to open the RIGHT side to disconnect the battery. You can attempt to do a replacement without disconnecting, but you may short something when preparing the wires to be threaded through the new hinge.
###
Tools and parts required
- PH00 phillips bit
- Metal/Plastic spudger or prying tool
- Hinge Replacement
- 16 Pin Connector - SUHR-16V-S-B (Optional)
- Any kind of tape that does not leave residue
- Dental floss designed for braces
[16pin Housing or SUHR-16V-S-B] I see a lot of places charging a lot for the 16 Pin connector. It should cost $0.42-$0.85 CAD. Shipping may bring your costs higher. You can find it off digikeys, mouser, or AliExpress.
Estimated Time: 50 minutes - 2 hours Cost: $35-40 CAD based on time of writing
###
Video Guide: WH-1000XM5 Single Hinge Replacement
###
Remove hinge from ear cup
Please review these steps from the headband replacement guide. Remember to disconnect battery if you are replacing LEFT side.
###
Removing 16 pin connector
I would recommend to purchase a new connector since they are really cheap - minus the shipping costs. If purchasing a new connector, you can use a flat head screw bit and break all the tabs.
###
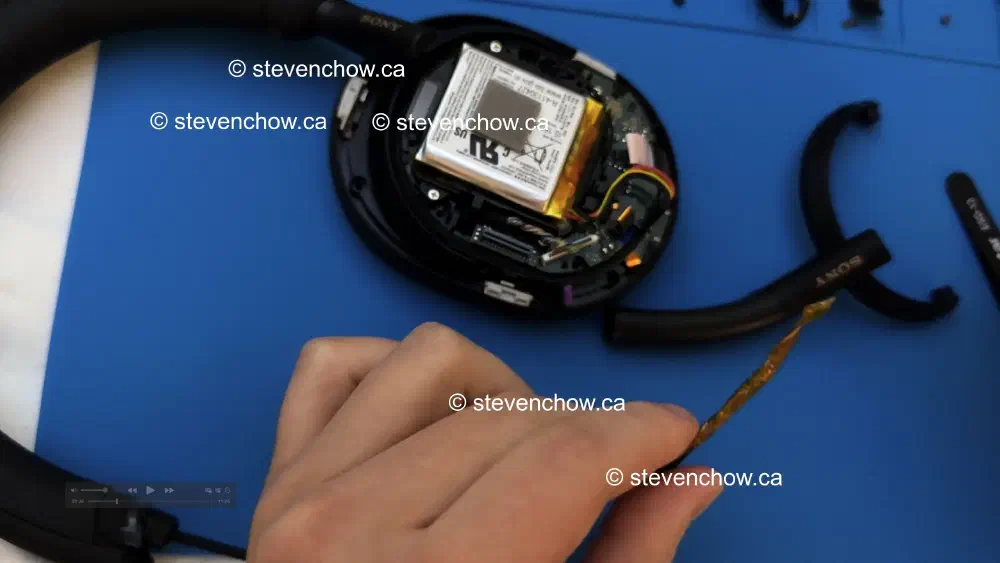
Removing broken hinge
###
Install new hinge

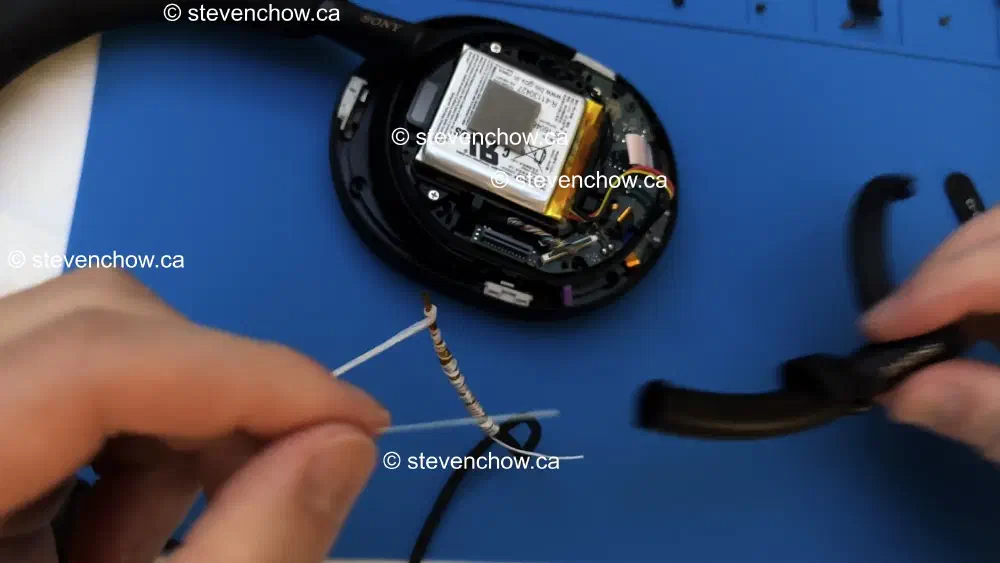
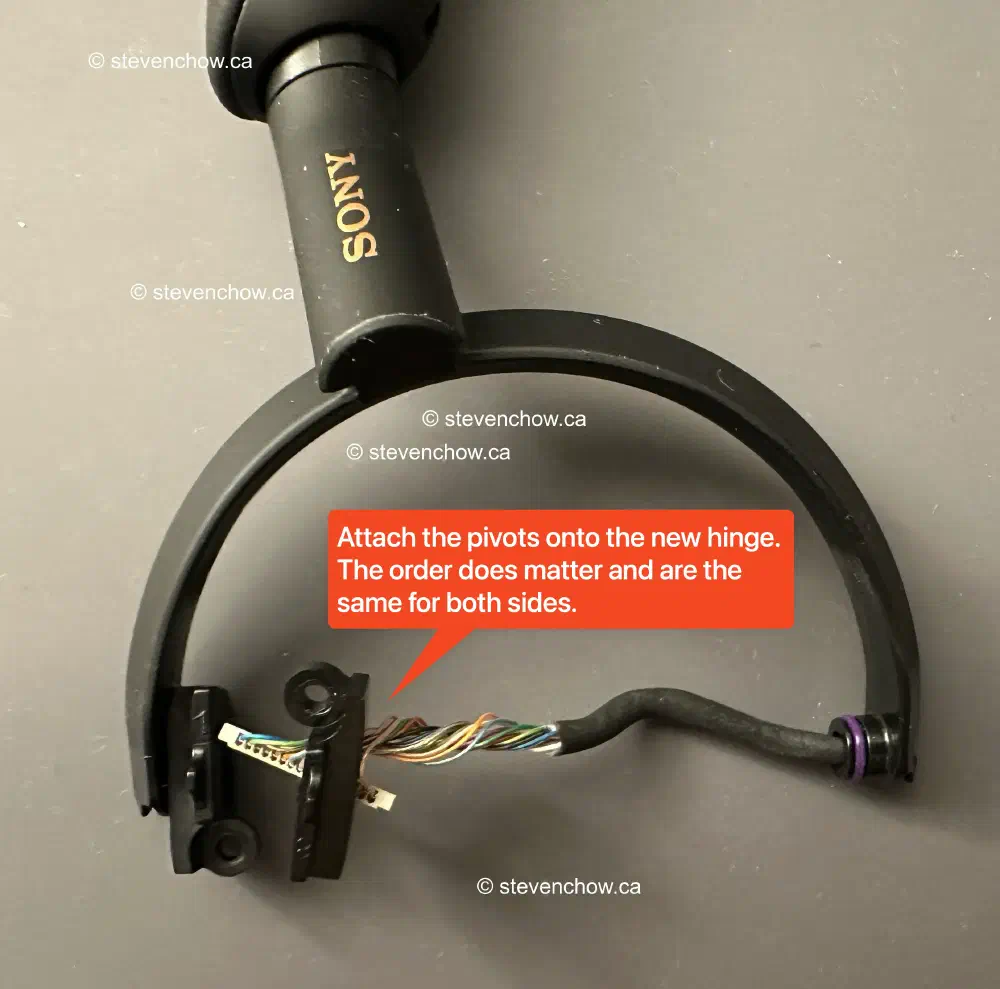
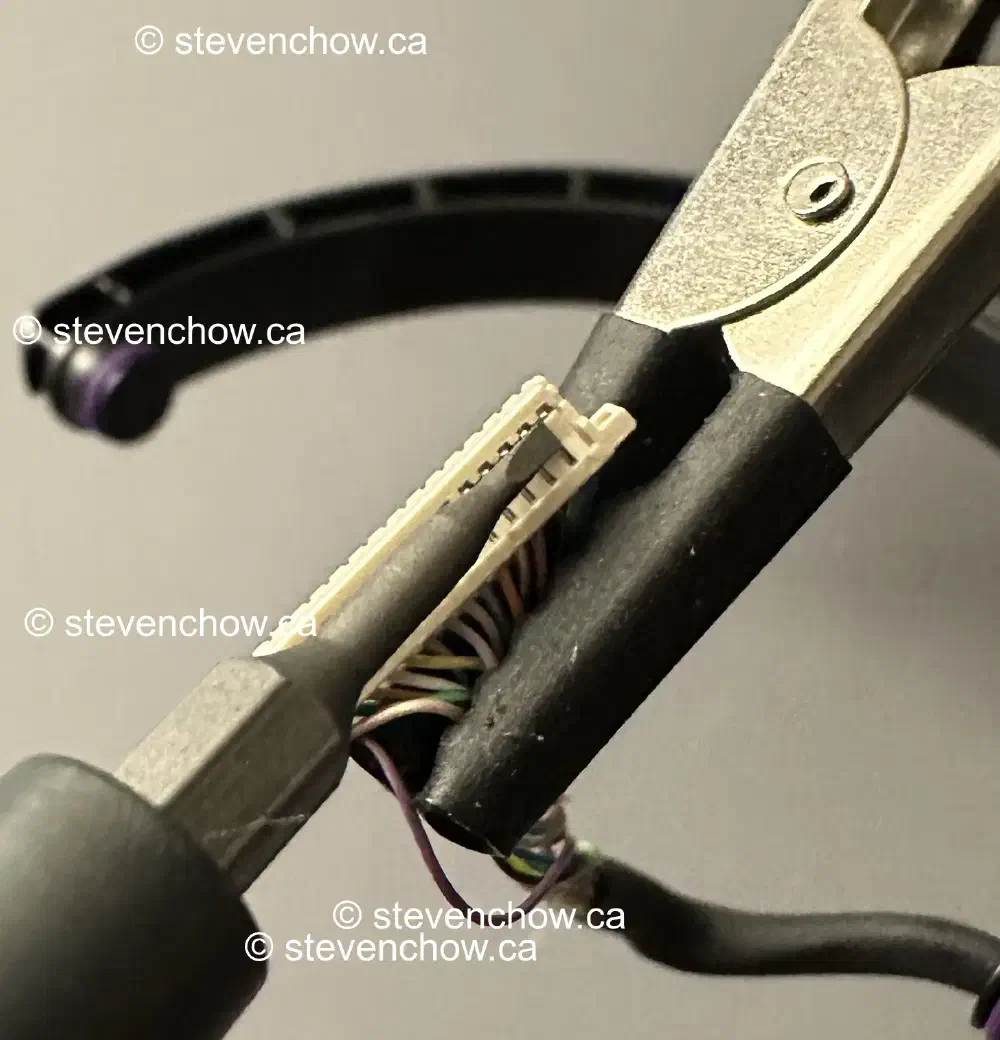
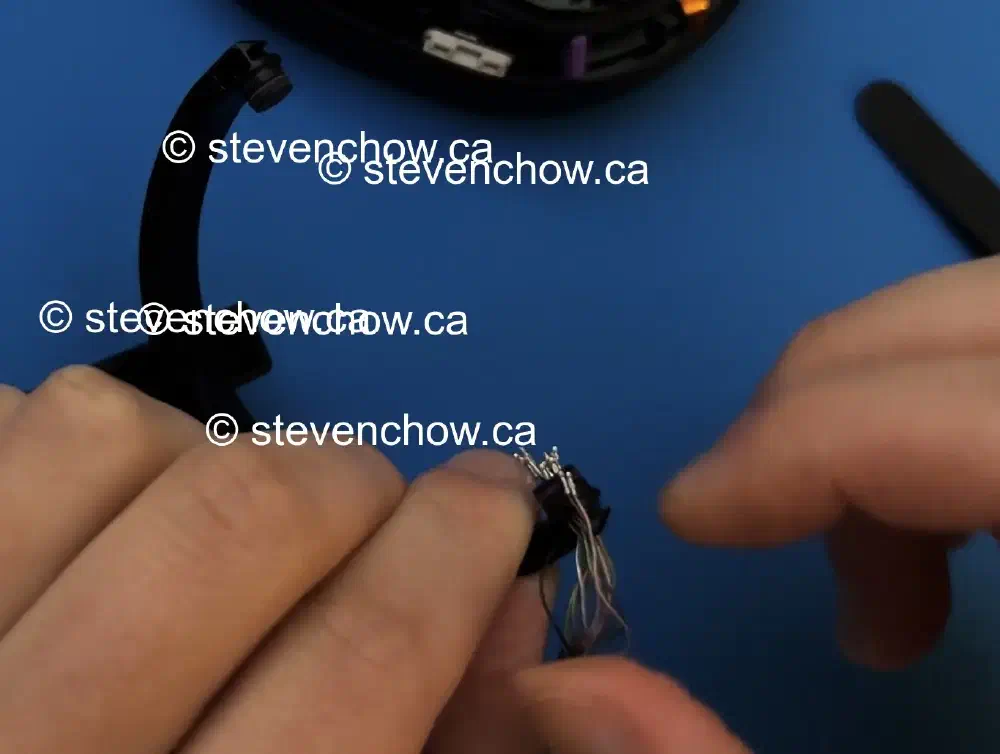
At this point you can remove the thread that’s wrapped around the wire. Leaving the tape, fish it through the tiny opening at the end of the hinge. Install the cap that hides the wire back on. Fish the wire through the plastic pivot (You can skip this for now, but it’s much easier to do while the 16 pin connector is off).
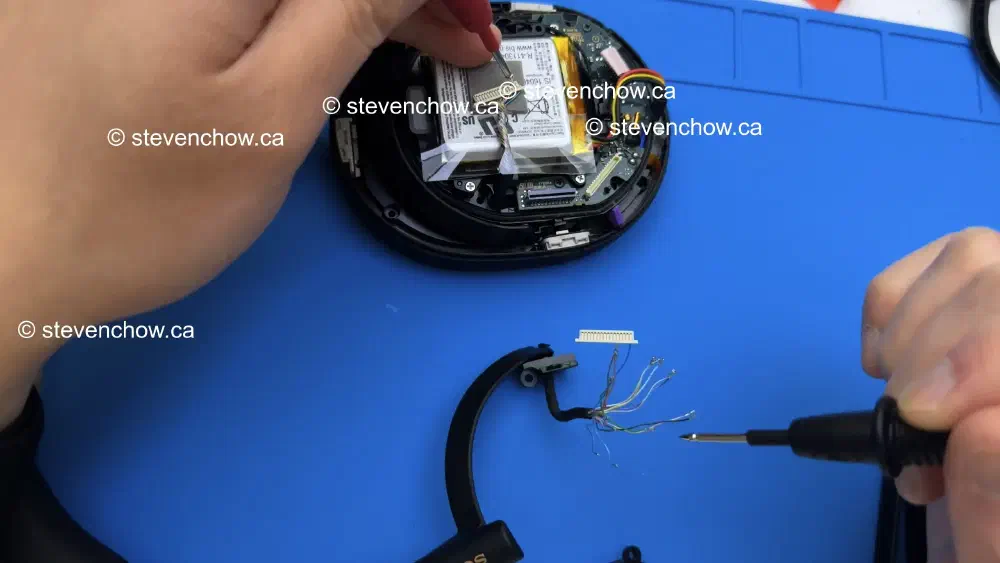
You can use a multi-meter to check for continuity. If wires are crossed, it may short the board causing major damage.
###
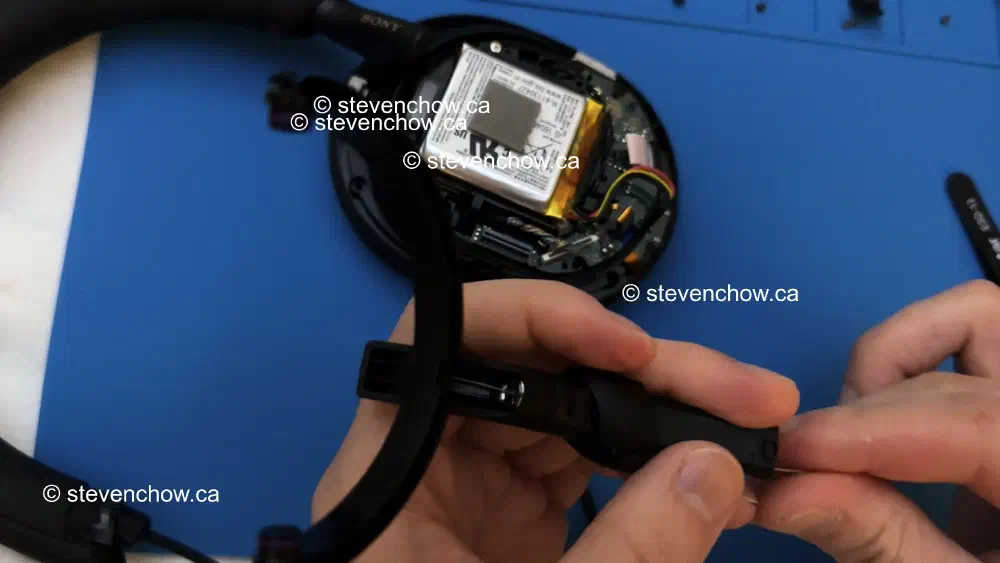
Attach the LEFT ear cup onto the new hinge
Reverse everything while doubling checking each step.
##
3d Print Replacement
I don’t have the skills or a 3d scanner to model the hinge. This is only useful if you’re able to model a working hinge, or only the upper half of your hinge is broken.
Update: Some people have modeled the yolk side of the hinge. Print material recommended is nylon and cf enforced filament that is then finished with some coating.
Notes: Layer delamination or separation can be an issues with 3d printed parts. Make sure you print in a temperature regulated enclosure. This will result in the best layer adhesion and hopefully it will be strong enough for headphone use.
Models: Hinge (upper half) Yolk side of hinge by waitin4ban Yolk side of hinge by FloTec09
###
Tools and parts required
- 3d Printer
- PH00 phillips bit
- Metal/Plastic spudger or prying tool
- 16 Pin Connector - SUHR-16V-S-B (Optional)
- Any kind of tape that does not leave residue
- Dental floss designed for braces
I see a lot of places charging a lot for the 16 Pin connector. It should cost $0.42-$0.85 CAD. Shipping may bring your costs higher. You can find it off digikeys, mouser, or AliExpress.
###
Installing the 3d Printed part
Same steps as the single hinge replacement, except you will be repairing your old hinge. If you have the design skills or a 3d scanner to image a working hinge, you can 3d print it and install it following the same steps as above.
#
Notes:
Part numbers:
- 16 pin connector - SUHR-16V-S-B
- Left side 16 pin header - SM16B-SURS-TF
- Right side 16 pin header - BM16B-SURS-TF
- 8mm silver JIS outer housing screws - 5-032-146-31 Screw, Tapping, P2, Totsupura
- 5mm black JIS internal screws - 5-032-146-21 Screw, Tapping, P2, Totsupura
##
Recommendations:
If you decide to purchase WH-1000XM5’s, choose Silver, Midnight Blue or Smoky Pink because they use less recycled plastic. Go with Black if you want to be able to purchase headband assemblies at a cost-effective price. The difference between a hinge replacement and a headband assembly replacement is ~$50 CAD.